Note
My learning and exploration of these topics are heavily AI-guided and my writing and thoughts are my own. My goal with this site is to serve as a knowledge base and playbook while displaying my work and progress.
Now that Proxmox is set up on the Optiplex and the RAM upgrade is finished, I need to set up my virtual machine that I will be running Wazuh on. Before even getting into Wazuh, I need to set up a virtual machine with an operating system and configure the operating system to prep it prior to installing Wazuh. This includes:
- Making sure system packages are up-to-date
- Installing OpenSSH server so that the virtual machine can be accessed remotely
- Installing Qemu agent, the Proxmox equivalent to SSM agent in AWS; allows the Proxmox hypervisor to see things like the guest IP, get the OS status (i.e., whether the virtual machine is booted or in a hung state), running guest commands from the host, handling password resets, and shutting the VM down from the hypervisor
Part of my plans for this homelab is to create multiple virtual machines to simulate different scenarios or attacks to observe and diagnose in Wazuh. This means that I will be setting up multiple virtual machines in the future, and there’s a strong possibility that I will have to set up another Ubuntu virtual machine and run through these same steps. With that in mind, I want to set future Emilio up for success and eliminate the repeatable parts of the setup process and this can be done with VM templates. The AWS equivalent of this would be an Amazon machine image (AMIs), which is a snapshot of an EC2 instance that is pre-configured with the operating system and packages already set up. This is convenient because presumably when you go to set up your next virtual machine the needs the same OS and configuration, you can just select that template to clone for your new VM, define the spec (i.e. CPU, memory, and storage), and then you’re on your way.
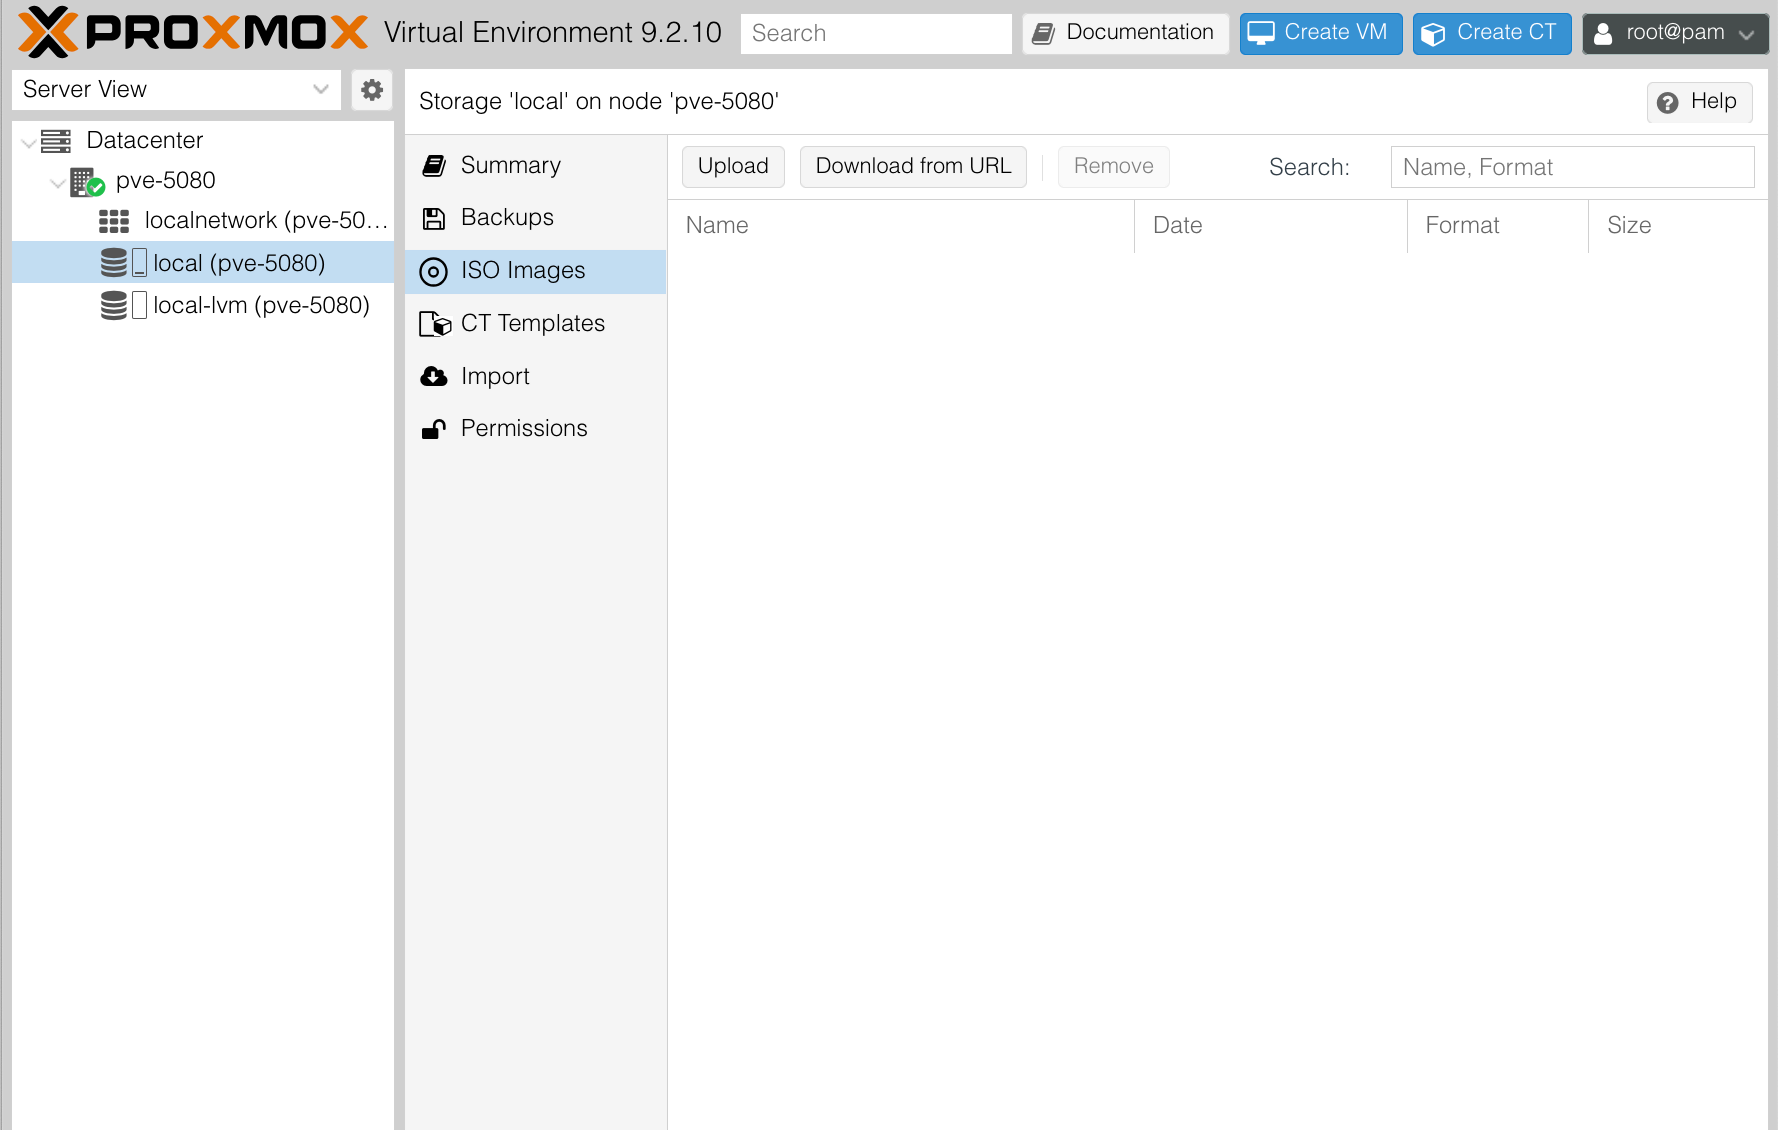
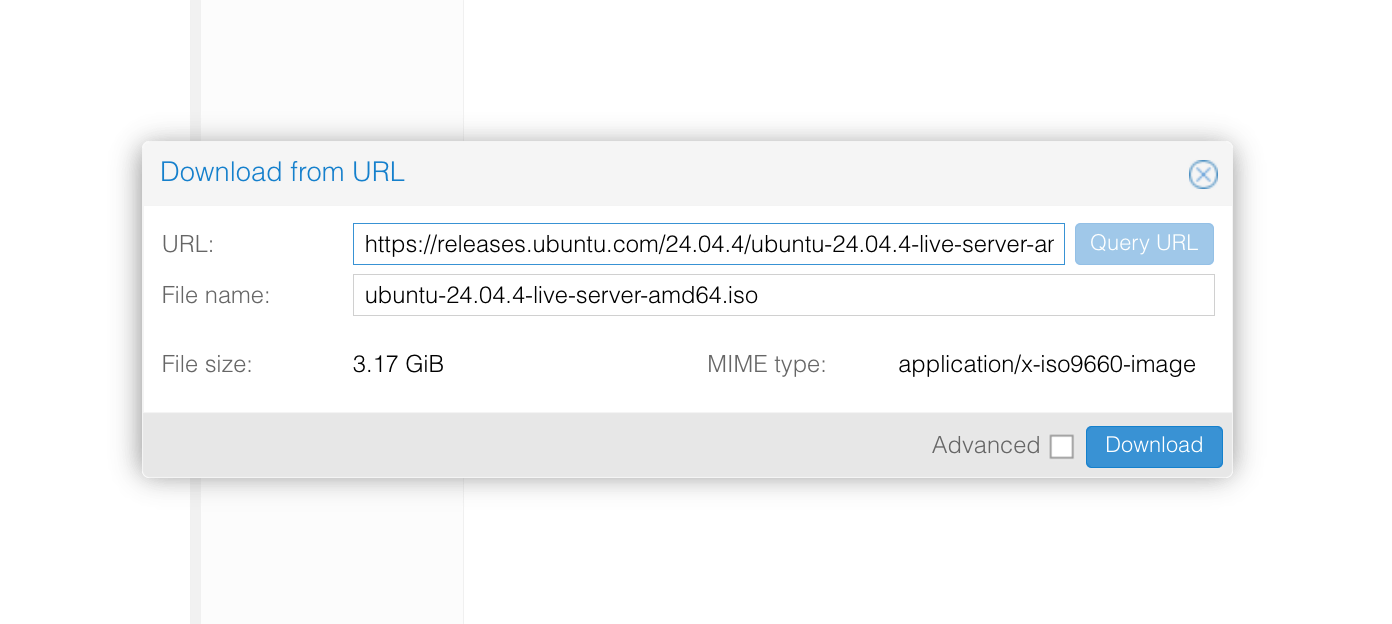
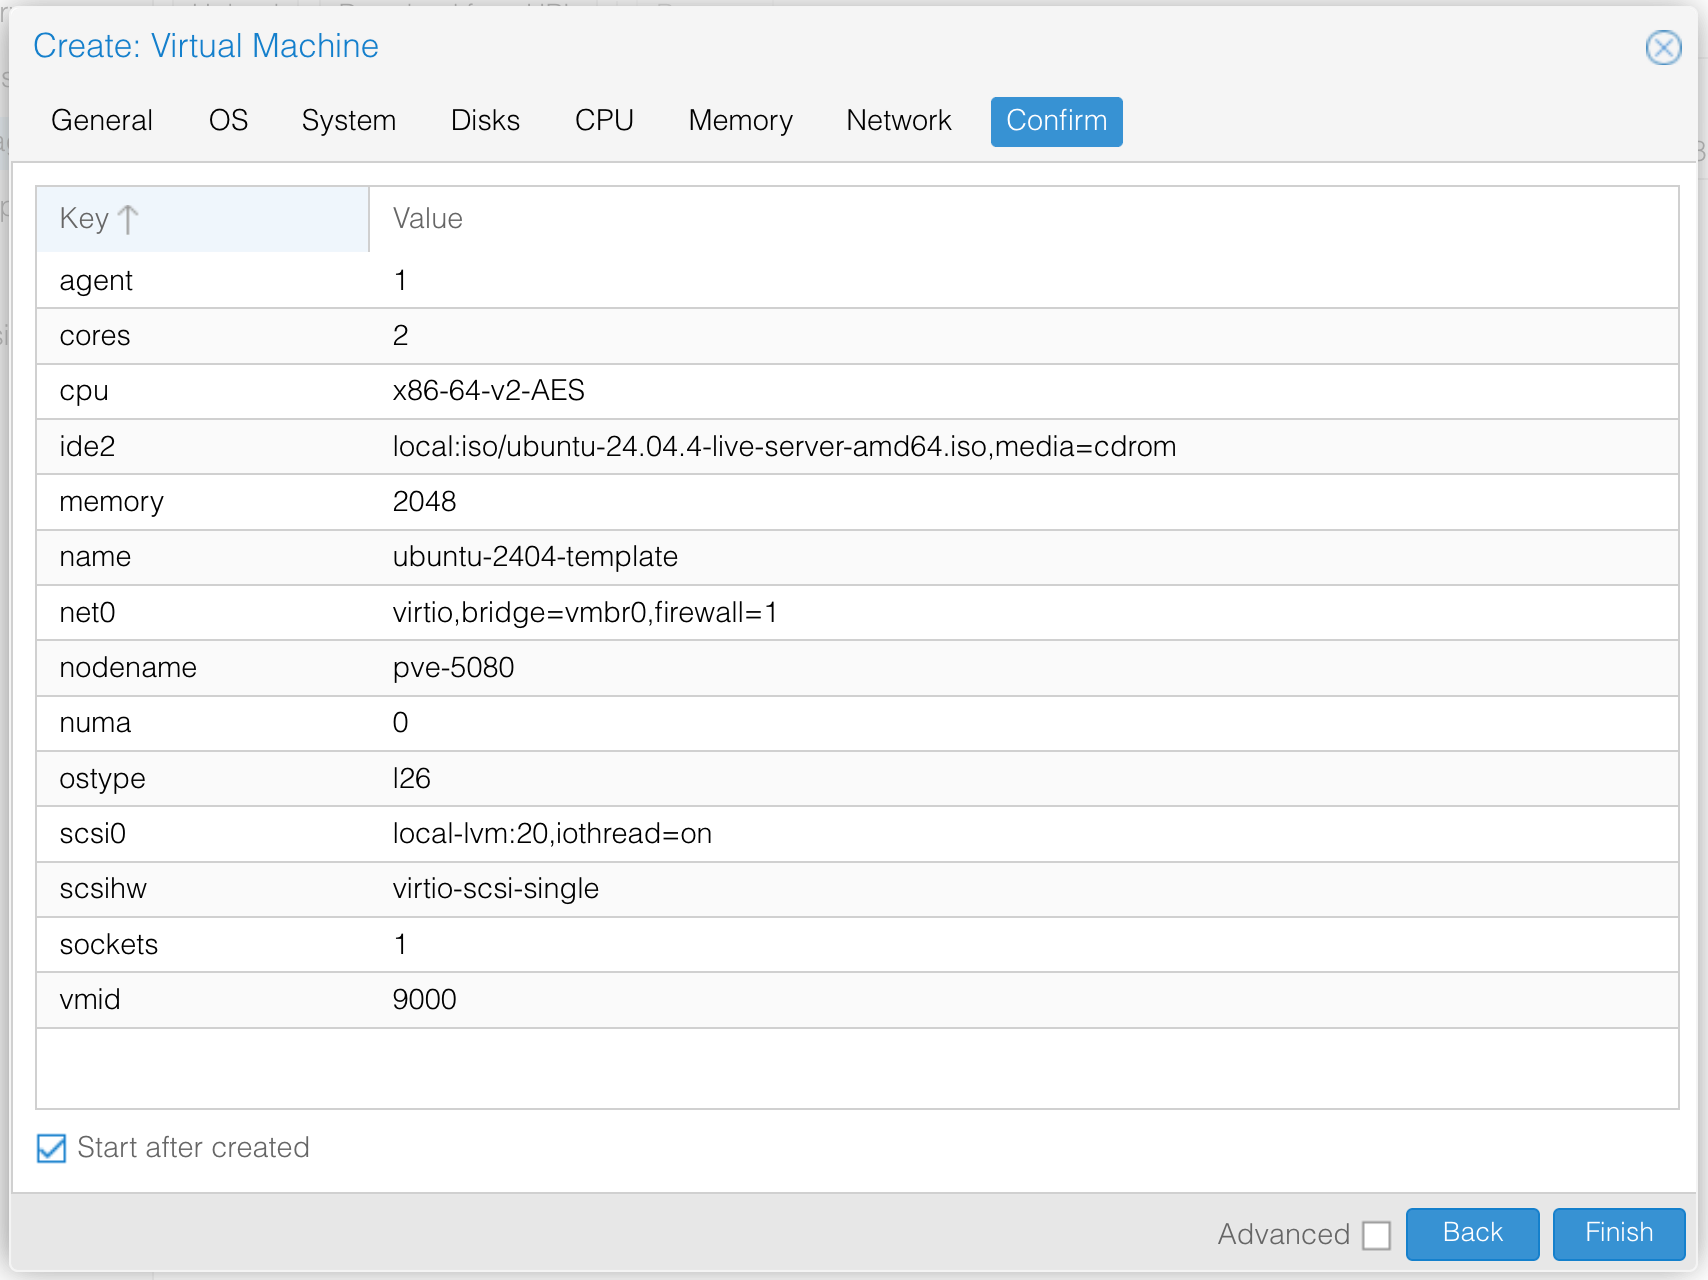
After you create the virtual machine, you’re going to boot it up and go through the Ubuntu installation process, selecting defaults for all of the selections. The only exception to this is to make sure that the “Install OpenSSH server” option is checked. Once you finish with the installation, there is an option to “reboot now” - DON’T HIT IT YET.
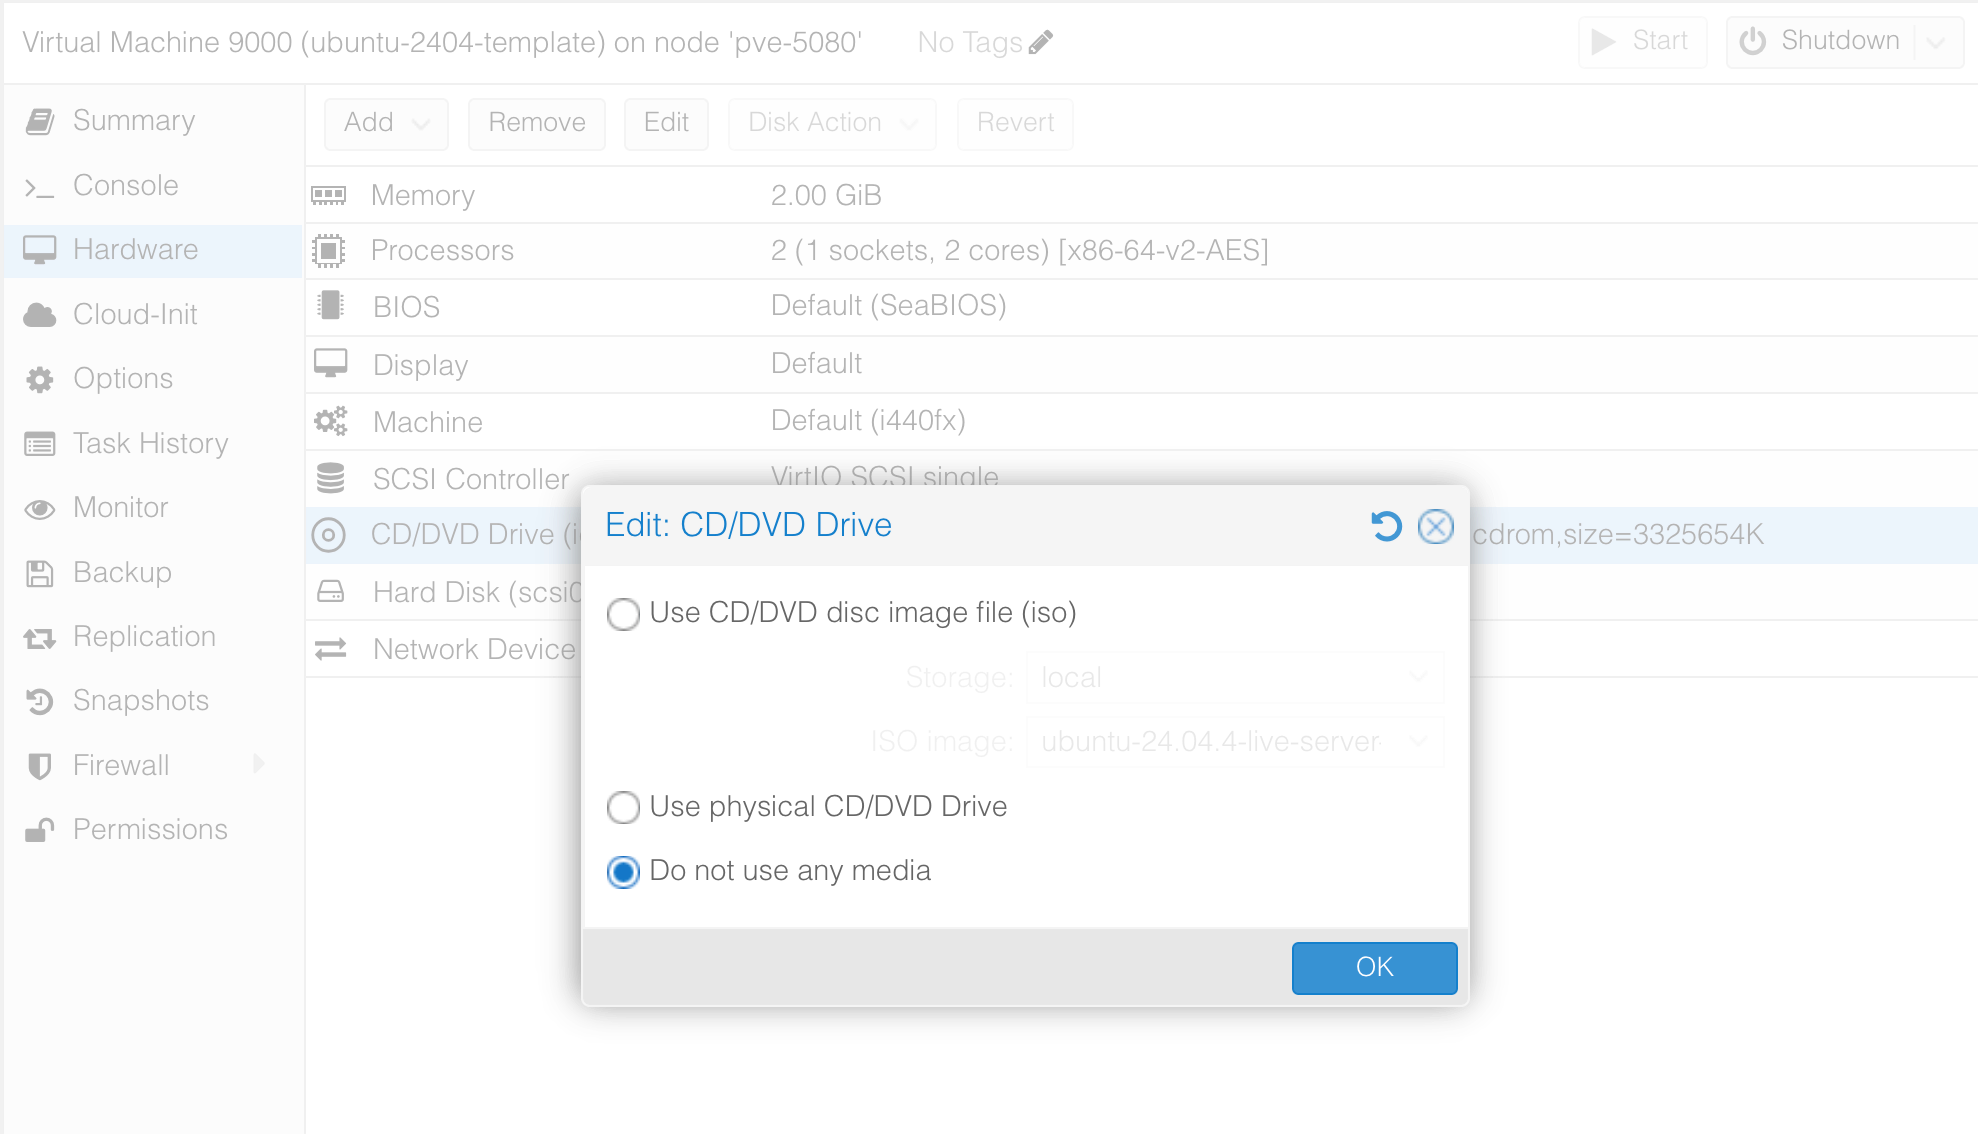
Go back into the Proxmox UI, click on your virtual machine under your host, go to the hardware tab, select CD/DVD Drive. Hit Edit to unmount the ISO, and select Do not use any media. Then go back to the console, and you’re good to reboot.
Troubleshooting
When I hit reboot after the installation completed, I got a blank screen and a blinking cursor. I tried sending a shutdown and reboot signal from the Proxmox UI, but nothing worked. Sending a “Stop” signal and then booting up again resolved the issue. Long story short, the shutdown signal is effectively politely asking the operating system to shut down, whereas sending a stop signal is the equivalent to “unplugging” the virtual machine.
Now it’s time to prep the guest (the VM just created). Login and run:
$ sudo apt update && sudo apt upgrade -y
$ sudo apt install qemu-guest-agent -y
$ sudo systemctl enable --now qemu-guest-agent
These commands download and install updates, install the guest agent, and start up the guest agent. You can verify that the Qemu guest agent is running. You should see active (running) in the output.
$ sudo systemctl status qemu-guest-agentGeneralizing the template
At this point the template is at a solid starting point for the next clone. The only thing left to do is to wipe the identity of the virtual machine so that future clones don’t adopt the same identity. There are 4 primary markers that we want to ensure that are unique with every clone: MAC address, IP address, machine ID, and the SSH host key.
MAC Address
Proxmox handles the MAC address, generating a new one on creation.
Machine ID & IP Address
The machine-id is a 128-bit identifier generated on first boot by systemd. It is literally a file found at /etc/machine-id. This ID is important because before a DHCP server hands out an IP lease, it needs to know who or what machine it is handing it out to. A device, or in this case a virtual machine, generates its DHCP client ID that is derived from the machine-id. If you have the same machine ID, you have two different virtual machines with the same IP address competing with each other.
SSH Host Key
Having unique SSH host keys is important because this is how devices identify themselves when being remotely accessed. If one clone is compromised, its private key can be used to impersonate all of the clones. Further, if multiple VMs share the same host key, it makes potentially tracing actions back to the VMs difficult.
The Wrong Way
To see what messing it up looked like in practice I cloned the VM, which you can do by right clicking (two-finger click on Mac) and selecting the Clone option, before wiping the machine-id and SSH host key before doing it the right way.
I ran the ip command to check out the values for the IP and MAC addresses:
$ ip addr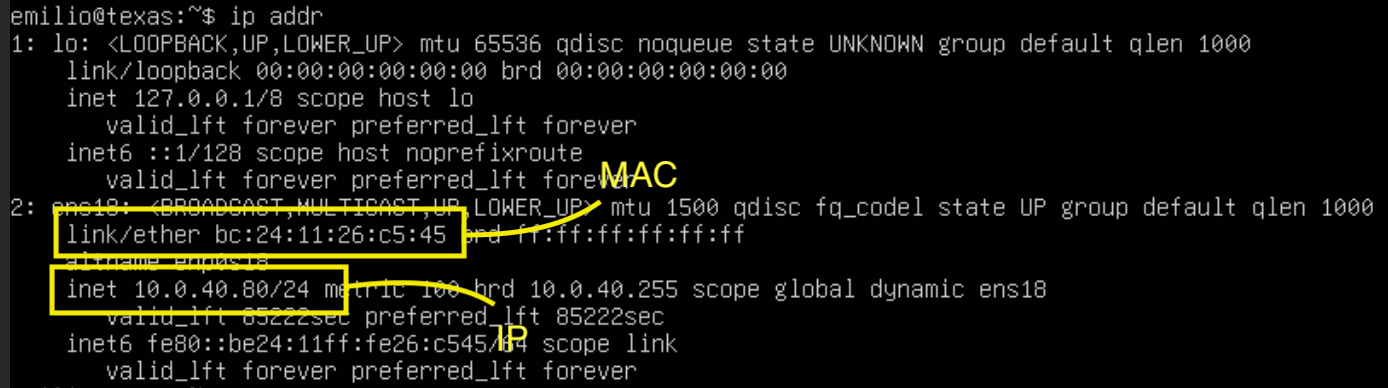
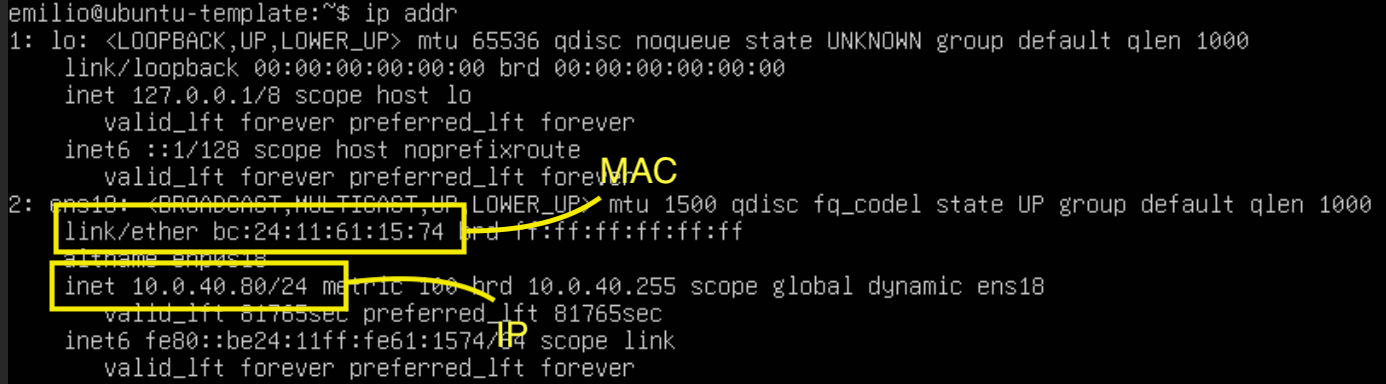
Check out the screenshots. The clone gets a new MAC address but remains with the same IP address. Earlier I said that the IP address was determined based on the VM’s machine-id, which the DHCP server (hands out IP addresses) uses to create an IP lease for that machine. If we check out the machine-id for both:
$ cat /etc/machine-id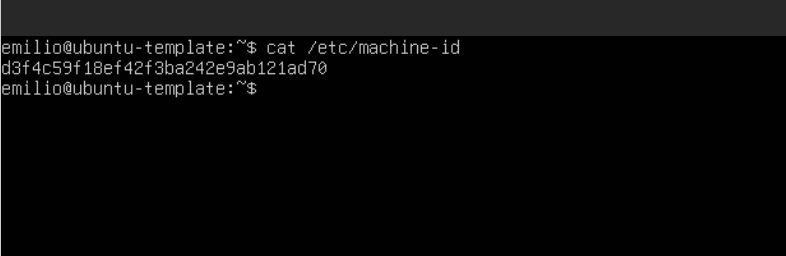
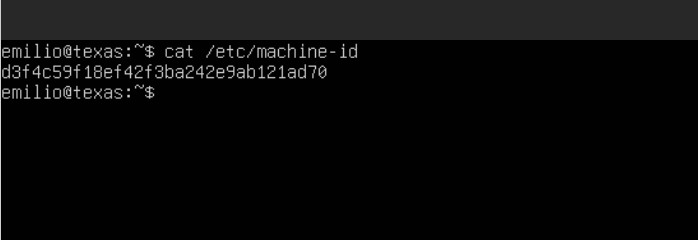
They’re the same, which means that there will inevitably be some weirdness happening with their IPs. I went to my UniFi controller, the default-ISP-router equivalent to logging into your router, to see how these two VMs are represented within the homelab VLAN, and sure enough:
Both VMs look like they’re fighting over which one is IP address 10.0.40.80.
Now if we check out the SSH host keys for each by running:
$ ssh-keygen -lf /etc/ssh/ssh_host_ed25519_key.pub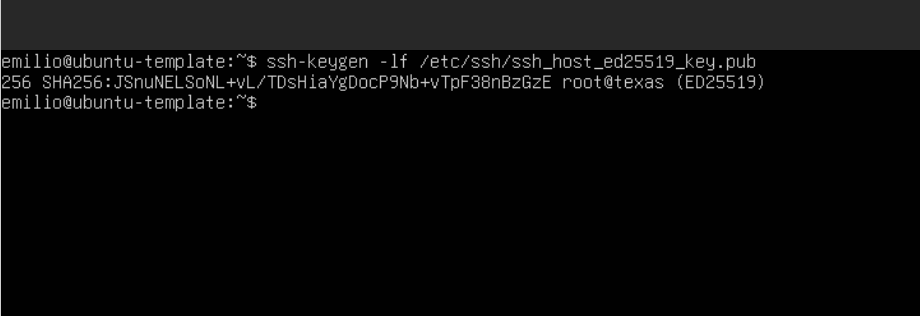
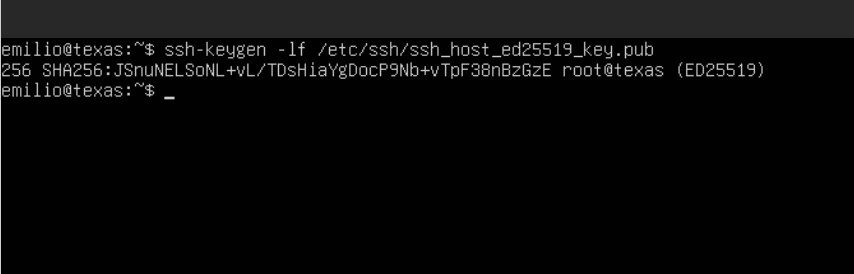
We get the same SSH host keys. Two machines sharing the same identity when authenticating over SSH. This makes the two machines indistinguishable from each other if there ever comes a time to investigate activity on either of these machines sharing the same host key.
The Right Way
Now that we’ve seen how to do things the wrong way, let’s clean up this VM’s identity properly.
# Erase the machine-id
$ sudo truncate -s 0 /etc/machine-id

# Remove the legacy dbus copy of the machine-id
$ sudo rm -f /var/lib/dbus/machine-id

# Create a symlink to /etc/machine-id so there is a single source of truth
$ sudo ln -s /etc/machine-id /var/lib/dbus/machine-id

# Delete SSH host keys so each clone gets its own identity/fingerprint
$ sudo rm -f /etc/ssh/ssh_host_*

# Clear the apt package cache to slim down the template image
$ sudo apt clean

# Wipe this session's shell history
$ history -c

$ sudo shutdown now
With the VM identity now wiped, a clone can now be made by right-clicking on the VM > Convert to template. After a few seconds, the VMs icon changes to represent that it is now a template, thus you cannot boot the template anymore, only clone it.
Creating the first clone: wazuh
Creating our first clone is as simple as right-clicking on our new template and then Clone. My first clone is named wazuh as that’s what I plan to use it for. The memory and CPU mirror whatever the template used, so I need to update that.
From the sidebar:
- Increase the memory:
wazuhVM >Hardware> double-click onMemory>8192 - Increase the CPU:
wazuhVM >Hardware> double-click onProcessors>4cores (leave sockets as is)
The wazuh clone is ready for first boot! On first boot the hostname will need to be reset as it inherits that from the template. Set the new hostname with:
$ sudo hostnamectl set-hostname [hostname]Now verify the clone has a new machine-id, MAC, and IP address with:
# Verify new MAC and IP Address
$ ip addr

# View the machine-id
$ cat /etc/machine-id
We’re officially ready to install and get started with our Wazuh SIEM. Before I go any further, though, I am going to switch over to using this machine via SSH from my personal laptop. Up until this point, I’ve been using the console within the Proxmox UI, which is pretty hard on the eyes. Accessing the Wazuh VM via SSH also, just makes for a better experience because my terminal is set up with all of the bells and whistles and syntax highlighting that makes using the terminal much more enjoyable. When I tried to SSH into the machine, I ran into this error:

This tells me that the clone probably does not have its SSH host key set up. To fix that, run this command back in the Proxmox console:
$ sudo dpkg-reconfigure openssh-serverTo be thorough and account for an SSH disconnect, I am going to run the installation process in a tmux window that will allow the installation to run in the background. That way, if for any reason the SSH connection disconnects, the installation will continue running in the background.
$ tmux new -s wazuh-installAnd now the all-in-one installation script:
$ curl -sO https://packages.wazuh.com/4.14/wazuh-install.sh && sudo bash ./wazuh-install.sh -aOnce the installation finishes, you get a success message and the admin credentials to log into your dashboard for the first time. Copy that password and store it until you’ve changed the admin password.
The full quick start installation guide that I use can be found here.
That wraps up the creation of the Ubuntu virtual machine template that can then be used to create future clones from. Next up is to start deploying Wazuh agents on all of the machines in the lab environment. The fun begins!